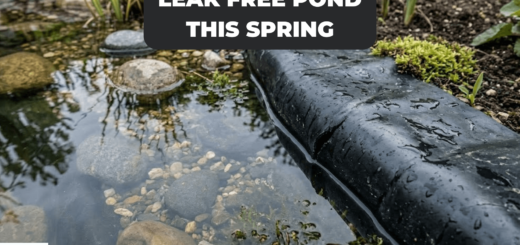
5 Signs Your Pond Liner Has a Winter Leak
Finding a leak in your pond during the dead of winter is enough to make any homeowner want to retreat under the covers. There is a specific kind of dread that hits when you walk out on a frosty morning and realize the ice on your pond looks “off.” Maybe it’s sagging in the middle, or perhaps there’s a wide gap between the ice sheet and the stone perimeter that wasn’t there yesterday.
Most pond owners are told that if a leak happens in the winter, they’re just stuck until the spring thaw. We’ve heard it all: “You can’t patch in the cold,” or “It’s probably just evaporation.” At Pond Pro 2000, we’ve spent decades helping people realize that winter leaks are not only common but also fixable—and neglecting them until April can be a very expensive mistake.
If you’re staring at a dropping water line and wondering if your fish or your investment will make it through the season, here are the five definitive signs that you’re dealing with a genuine liner issue and how to handle it.
1. The “Ice Bridge” and Tenting Effect
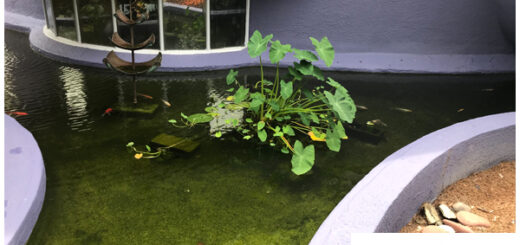
In a healthy, full pond, the ice layer rests directly on the water’s surface. This is crucial because the water provides the thermal mass needed to keep the pond from freezing solid to the bottom. If you notice “tenting”—where the ice stays stuck to the rocks at the edges but bows downward in the center—that is your first major warning sign.
When the water level drops beneath the frozen surface, an air pocket forms. This air pocket acts like a refrigerator, allowing the remaining water to lose heat much faster. In winter, evaporation is slow and negligible because the air is cold and often saturated. If you are losing inches of water overnight, it isn’t the wind; it’s a hole. Addressing a leaking pond immediately is the only way to maintain the depth your fish need to survive their dormant state.
2. The Frozen “Wet Spot” or Unseasonal Moss
Usually, the ground in winter is either frozen rock-solid or uniformly damp from snowmelt. However, if you notice one specific patch of ground near the pond that feels “squishy” under your boots, or if you see a patch of bright green moss or grass thriving while the rest of the yard is brown and dormant, you’ve likely found your exit point.
The freeze-thaw cycle is a powerful force of nature. As the ground freezes, it expands, often pushing sharp rocks or decorative stones against the liner. This “ground heave” can easily puncture an aging EPDM liner. If the water is escaping through the soil, it will often leave a “telltale” sign of moisture or ice build-up in the dirt, even when the rest of the yard is bone-dry.
3. The Waterline “Truth” Test
One of the few advantages of a pond leak is that water is bound by gravity. It will only leak until it reaches the exact level of the puncture. If your water level drops six inches and then stops perfectly at that line for three days, you don’t have to search the entire pond floor. Your leak is located exactly at that new waterline.
This is the time to get down on your knees and inspect the perimeter. Look for small punctures from ice shards or areas where the liner might have become brittle and cracked. Concrete ponds are especially prone to this because concrete is rigid; it doesn’t flex when the ground shifts in winter. This is why we always tell our customers that the best pond sealer isn’t just about stopping a leak today—it’s about having the “memory” and flexibility to adapt when the temperature swings by 30 degrees in a single afternoon.
4. Ice Dams and Peripheral “Wicking.”
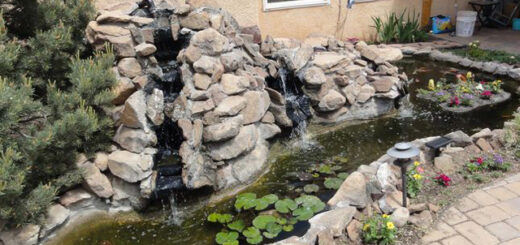
Sometimes the leak isn’t actually a hole in the liner, but a “diverted” leak. If you run a waterfall or pump during the winter to keep a hole open for oxygen, you must be careful about ice dams. As splashing water freezes, it builds up layers of ice on the rocks. Eventually, these ice formations can become so thick that they act as a dam, diverting the water behind the liner or over the edge of the streambed.
If you see massive ice formations on the outside of your rockwork or “ice volcanoes” forming on your lawn, your liner might actually be intact, but your water is being “wicked” out of the system. In this case, the solution is usually to clear the ice or adjust the flow, but if the ice has pulled the liner down, you’ll need a permanent bond to reattach it.
5. Your Auto-Fill System is Running in a Freeze
If you have an automatic water leveler, you might not see the water level drop, but you will certainly see the “leak” on your utility bill. If that valve is kicking on in January, you have a serious problem. Beyond the cost of the water, constant fresh water from a hose is usually much warmer (or much colder) than the stabilized water at the bottom of the pond. This constant influx can “wake up” your koi or goldfish, causing them to burn through their energy reserves and potentially leading to winter-kill.
Why You Shouldn’t Wait Until Spring
A small winter leak often becomes a large spring tear. Furthermore, if the water level drops too low, the pressure of the surrounding frozen ground can cause the pond walls to collapse because there is no internal water pressure to hold them back.
Using the right pond leak repair products means you don’t have to wait. While traditional hardware store patches and tapes often fail in the cold because their adhesives become “glassy” and brittle, Liquid EPDM is a different animal.
The Science of a Winter Repair
At Pond Pro 2000, we’ve developed a formula that works within “winter windows.” To apply our sealer, the temperature only needs to reach 50°F (10°C) for a few hours during the day. Once applied, the product initiates a chemical cross-linking process. Unlike water-based coatings that will freeze and ruin, Liquid EPDM is a solvent-based rubber. Once it’s on, it can withstand temperatures as low as -62°F without losing its bond.
A Step-by-Step for a Successful Winter Patch:
- Identify the Level: Let the water drop until it stops. This is your “Leak Line.”
- Clean the Area: Use a stiff brush to remove any algae or slime.
- Dry It Out: This is the most critical step in winter. Use a hair dryer or a small heat gun to ensure the liner is bone-dry. If moisture is trapped in the liner’s pores, the sealer won’t “bite.”
- Apply the Liquid EPDM: Brush it on about 2–3 inches past the edges of the visible tear.
- Let it Cure: Give it 24 hours to set before raising the water level.
Wrapping Up
Whether you are dealing with an old EPDM liner, a cracked concrete basin, or a leaking fiberglass feature, the goal is the same: stay flexible. The backyard environment is constantly changing, and your pond sealer should move with it.