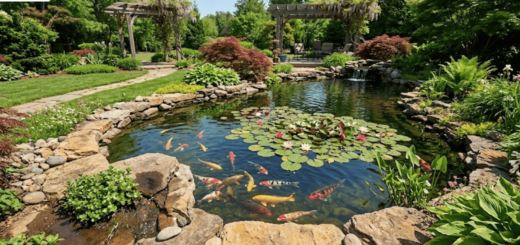
How to Prepare Your Pond for the “Spring Thaw”
There is a specific smell to the air when the ground finally begins to soften. For most, it’s a sign to head to the garden center, but for us, the “Spring Thaw” means it is time to check the waterline. Winter is a brutal season for any water feature; the constant cycle of freezing and expanding acts like a slow-motion jackhammer on your pond’s structure.
If you’ve ever walked out to your backyard in March only to find your water level has dropped six inches overnight, you know the sinking feeling of a winter leak. Preparing your pond for the season isn’t just about scooping out old leaves – it’s about using a to ensure that your backyard retreat stays watertight through the unpredictable spring weather.
The Hidden Stress of the Freeze-Thaw Cycle
We often think of ice as a static block, but it’s actually incredibly dynamic. As water turns to ice, it expands by about 9%, exerting thousands of pounds of pressure against your pond walls. If you have a concrete setup, this pressure forces its way into microscopic pores, creating the spiderweb cracks we see every spring.
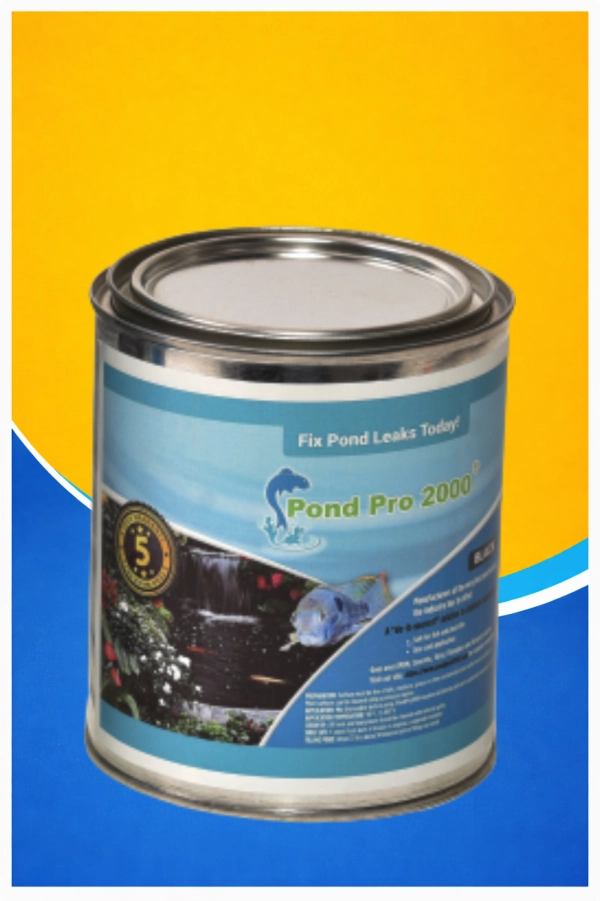
Before you even think about turning the pumps back on, you need to assess the damage. A high quality is your best defense here. Unlike rigid patches that pop off the moment the ground shifts, pond sealant actually stretches with your pond, moving as the earth breathes during the thaw.
Step 1: The “Muck” Phase and Early Cleanup
Let’s be honest: the first spring cleanup is never glamorous. Beneath that melting ice is a layer of “sludge” – decomposed leaves, organic runoff, and windblown debris. If left alone as the sun hits the water, this muck creates an ammonia spike that can be devastating for your fish.
- The Deep Clean: Use a soft pond net to clear the heavy debris. Avoid using metal rakes that could snag a liner.
- The Sniff Test: If the water smells like rotten eggs, you have anaerobic bacteria buildup. It’s time for a partial water change.
- Edge Inspection: Walk the perimeter. Look for “heaving” where rocks or soil have shifted toward the water.
Step 2: Finding That Pesky Leak
The spring thaw is actually the best time to find a leak. Why? Because the ground is already saturated, making “wet spots” around the exterior of your pond much easier to spot. If your water level is dropping, let it go until it stops. Wherever the water level stabilizes is exactly where your leak is located.
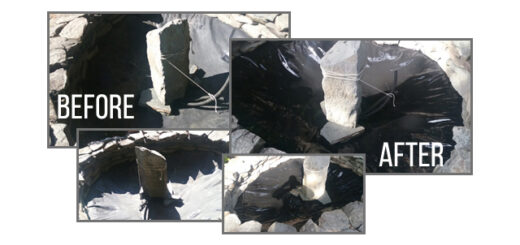
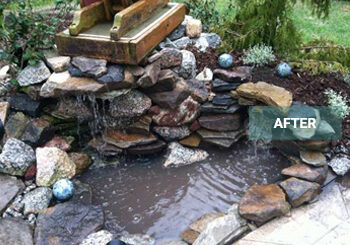
For those dealing with hairline fractures in masonry, a is the only permanent fix. Traditional cement patches are just a “band-aid” because they don’t bond chemically. You need a solution that penetrates the pores and creates a single, unified membrane.
Step 3: Why Surface Prep is 90% of the Battle
I always tell people that applying the coating is the easy part—it’s the prep that matters. If you’re applying a, the surface needs to be bone-dry and free of “chalking” (that white dust you see on old concrete).
If you are working with an existing pond liner that has a tear, remember the “Flash Coat” rule. Apply a very thin layer first. This allows the rubber to get a “grip” without causing the old liner to swell or ripple. It’s these small DIY details that make the difference between a one-year fix and a fifteen-year seal.
Step 4: Timing the Temperature
One of the most common questions we get at PondPro2000 is: “Is it too cold to start?”
The beauty of a professional-grade product is its tolerance. While you want daytime temps around 50°F for optimal flow, liquid EPDM is remarkably forgiving. If a surprise frost hits overnight, the curing process pauses. It doesn’t ruin the application; it just waits for the sun to come back out to finish the job.
Step 5: Bringing the Ecosystem Back to Life
As the “Spring Thaw” completes, your fish will start moving up from the bottom. Their metabolism is tied to the water temperature, so don’t start heavy feeding until the water is consistently above 50°F.
More importantly, check your pH. Old, unsealed concrete can leach lime into the water during the spring rains, causing a pH “swing” that stresses your fish’s gills. By applying a, you aren’t just stopping leaks; you’re creating a bio-friendly barrier that keeps your water chemistry stable and your fish healthy.
Wrapping Up: Don’t Chase the Leak All Summer
We’ve all been there – trying to patch a pond in the middle of July when the heat is unbearable, and the algae is in full bloom. It’s exhausting. By tackling your maintenance during the spring thaw, you’re setting yourself up for a summer of relaxation rather than repairs.
Whether you are sealing a small koi pond or a massive landscape feature, using a product gives you the peace of mind that once the job is done, it stays done. Grab a roller, wait for a dry weekend, and give your pond the protection it deserves.